How to Use Canva Magic Studio
Learn how to use Canva Magic Studio to create, edit, review, and deliver an AI-assisted visual asset with a practical, safe workflow.
Direct answer
To use Canva Magic Studio, start with a specific visual deliverable, open Canva AI or a supported design, describe the result you need, choose the relevant design or media tool, generate a starting point, and then edit, verify, brand, and approve the asset before export.
The important step is not the prompt. It is taking the generated result through the complete production workflow. Canva’s advantage is that AI-assisted design, media, writing, translation, and editing sit inside an environment where the output can remain editable.
This tutorial follows official Canva product and Help Center documentation checked on August 24, 2026. We did not use an authenticated account to reproduce every step. Interface labels, availability, limits, and plan requirements can change, so treat current on-screen instructions as authoritative.
Before you begin
Prepare these inputs:
- a Canva account with access to the required feature;
- one defined output, such as a presentation, social post, document, or short video;
- an approved brief with audience, purpose, message, and format;
- source copy and facts that have already been verified;
- approved logos, colors, fonts, and images if brand consistency matters;
- permission to upload every file included in the prompt or design;
- a reviewer for factual, brand, legal, and accessibility checks.
Also check the account’s plan and remaining AI allowance. Canva’s current pricing page lists limited AI access on Free and larger allowances on paid plans, but usage can vary by tool. Do not begin a high-volume workflow without understanding the current limit.
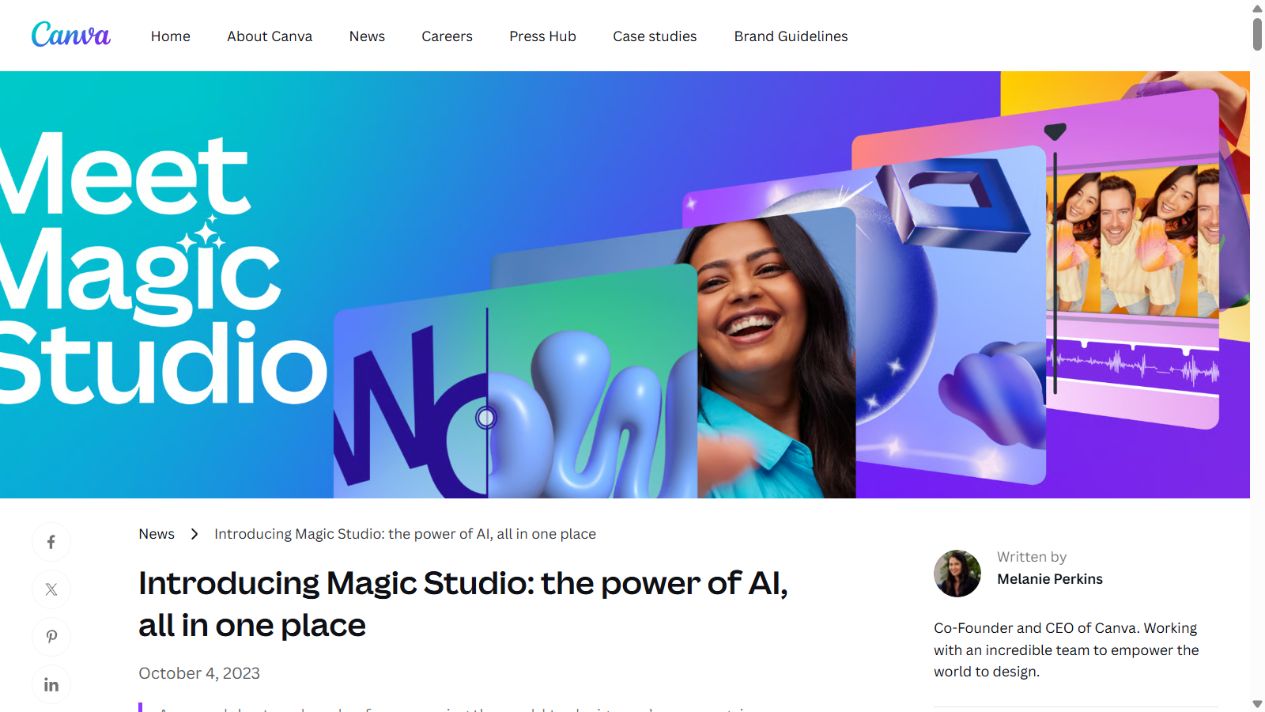
Official Magic Studio introduction page. Source: Canva . Captured August 7, 2026, to orient readers to the documented product environment.
Step 1: Define the finished deliverable
Write a one-sentence job before opening Canva. For example:
Create a 10-slide customer onboarding presentation for new small-business clients, using approved brand colors and verified product instructions.
This is more useful than a vague goal such as “make a professional presentation.” The sentence defines format, audience, purpose, and constraints.
List the acceptance criteria:
- correct format and dimensions;
- required facts and source material;
- brand elements;
- accessibility requirements;
- deadline and approver;
- prohibited or confidential information.
These criteria become the review checklist later.
Step 2: Open Canva AI or a supported design workflow
Canva’s Help Center describes a homepage path for Magic Design:
- Sign in to Canva.
- Open Canva AI from the homepage.
- Enter a concise description in the prompt box.
- Optionally add an upload, an existing Canva design, or brand resources where available.
- Select the intended output, such as a design, image, or video clip.
- Choose any available format or style controls.
- Submit the prompt and review the results.
Magic Design can also be used from a supported editor. Open the Templates panel, enter a descriptive request, and review existing or generated template options where the account provides them.
If the interface differs, use Canva’s current Help Center instructions. Product navigation can change faster than an external tutorial.
Step 3: Write a useful prompt
Include enough context to guide the starting point without placing sensitive data in the prompt.
A practical structure is:
Deliverable + audience + purpose + required content + visual direction + constraints
Example:
Create a square social graphic for operations leaders announcing a webinar about software evaluation. Use a restrained navy and teal palette, one clear headline, a short date line, and space for an approved logo. Avoid stock-style people and unverified statistics.
This prompt identifies the output and constraints. It does not ask Canva to invent the event facts.
Keep volatile or factual material separate. Add verified dates, prices, product claims, and citations manually from an approved source rather than asking a generator to supply them.
Step 4: Choose the correct Magic Studio tool
Use the tool that matches the job:
- Magic Design for editable layout or template starting points;
- Magic Media for generated images, graphics, or short video clips;
- Canva AI Video for supported prompt-based video creation where available;
- Magic Write for draft copy or text transformations inside the Canva workflow;
- Magic Switch for plan-dependent format or language adaptation;
- focused editing tools for removing, replacing, expanding, or repositioning parts of an image.
Do not assume one tool performs every task. Canva’s Help Center explicitly distinguishes Magic Design, which arranges and stylizes content, from media-generation tools.
Step 5: Generate a small set of options
Generate only enough options to identify a useful direction. Producing dozens of drafts can consume allowances and make review harder.
Evaluate each option against the brief:
- Is the hierarchy clear?
- Does the output fit the required dimensions?
- Is the concept relevant to the audience?
- Can each important element be edited?
- Are there obvious visual defects?
- Does it avoid unsupported text or claims?
- Is the design distinct enough for the brand?
Choose the most editable, appropriate starting point—not necessarily the most visually dramatic result.
Step 6: Edit the result in Canva
Replace generated or placeholder content with approved material. Adjust:
- headline and supporting copy;
- type size, line breaks, and spacing;
- colors and contrast;
- imagery and cropping;
- alignment and visual hierarchy;
- brand assets;
- chart labels or data;
- captions and calls to action.
If the design will appear in several formats, finish and approve the primary version before adapting it. Otherwise, the team may repeat the same errors across every variation.
Step 7: Apply brand resources carefully
Where the plan provides Brand Kits, approved templates, or team resources, use them to reduce inconsistency. Check that the selected fonts, colors, logos, and image style match the intended brand system.
Do not assume applying a Brand Kit completes brand review. A design can use the correct colors while still having the wrong tone, image, hierarchy, or message.
For teams, define who may create templates, who may change brand resources, and who can approve final output.
Step 8: Verify factual and visual accuracy
Run a structured review before export.
Factual review
- Compare every claim, date, price, statistic, and product statement with its approved source.
- Remove generated claims that cannot be verified.
- Confirm names, trademarks, event details, and contact information.
Visual review
- Inspect faces, hands, objects, text, and repeated patterns in generated images.
- Check image crops at final dimensions.
- Confirm charts and diagrams represent the underlying information accurately.
- Remove visual elements that imply a product feature or result without evidence.
Accessibility review
- Check text contrast and readable font size.
- Avoid placing important text over busy imagery.
- Provide captions or transcripts for video where required.
- Write meaningful alt text in the publishing system.
- Ensure information is not conveyed only by color.
Rights and privacy review
- Confirm permission to use uploaded and generated material.
- Remove personal, client, billing, credential, or confidential data.
- Review Canva’s current terms for the intended use and market.
Step 9: Adapt the approved design
After the primary asset is approved, use plan-dependent tools such as Magic Switch or Canva’s resizing and translation workflows to create variants.
Review each variant separately. Automated adaptation can introduce:
- awkward line breaks;
- clipped text;
- weak hierarchy;
- unsuitable crops;
- incorrect translation;
- inconsistent calls to action.
A translated design should be reviewed by someone qualified in the target language and context.
Step 10: Export, publish, and document
Choose an output format appropriate to the destination. Before delivery:
- preview the final asset at its actual display size;
- confirm the filename and version;
- record the source design and reviewer;
- retain source links for factual content;
- document any AI-assisted media when policy requires it;
- store the editable source in the approved team location.
Do not overwrite the only approved version with an experimental edit. Preserve a recoverable source or version history.
Troubleshooting common problems
A feature is missing
Check the plan, account type, country, administrator settings, design format, product rollout, and remaining allowance. Consult the current Canva Help Center rather than assuming the account is broken.
Results do not match the brief
Reduce ambiguity. Specify the deliverable, audience, format, required content, and constraints. Provide approved source material where safe. If the tool repeatedly fails, choose a template manually or use a different workflow rather than continuing to spend allowance.
The output looks generic
Replace default imagery and copy, use an owned visual system, apply approved typography, and edit the composition. AI should accelerate a distinctive direction, not define the direction by itself.
Text or facts are wrong
Replace them with approved copy. Do not ask the tool to “make the fact more accurate” without giving it the verified source.
Resized versions break
Treat resizing as a first draft. Rework hierarchy, crop, spacing, and text for each important format.
A safe team operating procedure
For recurring production, define these roles:
- Requester: provides the approved brief and source facts.
- Creator: uses Canva and records AI-assisted steps.
- Reviewer: checks factual, brand, accessibility, and rights issues.
- Approver: accepts the final deliverable.
- Administrator: manages account, plan, templates, permissions, and policy.
Measure time to approval, review rounds, major corrections, accessibility defects, and allowance consumed. This reveals whether Magic Studio improves the complete workflow rather than merely increasing draft volume.
Create a lightweight production record for important assets. Record the brief owner, source design URL, source documents, Magic Studio tools used, creation date, account plan, reviewer, approval date, and final destination. For visual claims or product demonstrations, retain the official source that supports what the design shows.
This record makes later corrections easier. It also prevents a future editor from assuming that generated copy, imagery, or data was independently verified. When a design is refreshed, duplicate the approved version, recheck volatile facts, and update the review date rather than silently changing the production source. Teams do not need heavy bureaucracy for every social image, but recurring, commercial, regulated, or externally cited assets need a traceable owner and evidence path.
For a deeper capability map, read the Canva Magic Studio features guide . The Canva Magic Studio review covers buyer fit, and the pros-and-cons analysis explains the main trade-offs.
Sources checked
- Canva Help Center: Use Magic Design
- Canva Help Center: Use Magic Media
- Canva Help Center: Grab Text
- Canva: Introducing Magic Studio
- Canva plans and pricing
- Canva Shield and safe AI
Final checklist
Before delivering a Magic Studio asset, confirm that the brief is satisfied, the content is editable, every factual claim is verified, generated media has been inspected, brand and accessibility checks are complete, permissions are clear, and an accountable reviewer has approved the final version.
That process is the difference between experimenting with an AI feature and using Canva Magic Studio as a reliable production tool.
Frequently asked questions
How do I access Canva Magic Studio?
Sign in to Canva and open Canva AI or a supported design workflow. Available Magic Studio tools and allowances depend on the current account and plan, so confirm access in the interface and on Canva's official pricing page.
How do I use Magic Design?
From the Canva homepage, open Canva AI, describe the design you need, optionally add files or brand resources, choose a design output, and review the suggested templates. You can also generate or search for templates from the editor's Templates panel.
Can Canva Magic Studio create images and videos?
Canva offers prompt-based media tools including Magic Media and Canva AI Video, with different output types and limits. Select the relevant output in Canva AI, describe the result, generate options, and review them before adding one to a design.
Why is a Magic Studio feature unavailable?
The feature may depend on the plan, market, account type, administrator setting, usage allowance, design format, or current product rollout. Check the account's plan and allowance, then consult Canva's current Help Center documentation.
Can I publish Canva AI output without editing it?
You should review and usually edit it first. Check factual accuracy, visual defects, brand fit, permissions, accessibility, privacy, and the final format before publishing or sending the asset.